• If You Are Having Trouble Logging In with Your Old Username and Password, Please use this Forgot Your Password link to get re-established.
  • Hey! Be sure to login or register!

Building and finishing my 2+2/PA 14

Some good door info can be found here. http://www.supercub.org/forum/showthread.php?43342-PA-12-Seaplane-Door-need-advice-amp-ideas

Making closed end thimble strikes to drop and weld into the frame tubes is simple enough. When I did it I used 3/16 SS round locking rods and cut tapered ends to pull the door tight as the handles were rotated to close. The rods were bent 90* and pinned at the bellcranks with small cotter pins. Handles were from a truck canopy shop and had key locks. I did have a return spring. You can see it in the pics on the forward lock rod. The only time I had any issue was when I tightened the plexi against the foam tape and changed the strike backset enough that the doors wouldn't latch all the way. The doors would pop open in turbulence. Not fun when you're already wrestling with the plane to keep it in control.
 
Last edited:
Stewartb, good ideas, I've looked at the post you attached and used that info up to this point, thanks. Skywagon, I can't add the welded in thimbles at this point, should have done that before painting. I'm leaning toward just one latch at the bottom, apex of the door. Talked to Duane who has the prototype 2+2 and that's what he has. I do have room for one plunger in that area, through the jamb. I'm leaning toward one slide at the apex instead of a plunger; it would be surface mounted (thanks Duane) with linkage inside, offset to the inside. The surface mounted slide would be adjustable (with shims) to adjust for fit against the door seals, something not easily done with a pin. It looks like the Super Chub (http://www.supercub.org/forum/showthread.php?39079-My-Super-CHUB!) did a single pin at the apex also, like the prototype. I know most builders of seaplane doors use two pins but I think my door is pretty rigid so one at the center should be ok, only flying will tell. So, off to the shop today to see what I cam mock up before drilling any holes. That's what I'm currently thinking and planning. If there are any other ideas or concerns, let me know what you think. Thanks.

Marty
 
If you already added open tubes for strikes? Seal them with the sealer of your choice, like silicone. Chase the sealer down past your pin's range with a suitable dowel.
 
Marty, your latch system is different than mine or I'd send you some pictures. Your right every one does it a different way
 
Tim,
That's what I have found out. There isn't even a hint in the plans about a door latch so builders are on their own.

I think after talking to Duane and looking at the prototype 2+2, I have a solution to the problem. I got some ideas from Duane today, looked at his pictures and Super Chub and decided to do one sliding latch only. The linkage will be inside the door with just sliding latch outside the door. The guide for the slide bar can be shimmed to adjust how tight the door seals against the jamb. If there are any issues I could add a second latch later. I attached a picture of my mock up; it works real easy and smooth.

Marty

IMG_8521.jpg
 

Attachments

  • IMG_8521.JPG
    IMG_8521.JPG
    1.9 MB · Views: 106
  • IMG_8521.jpg
    IMG_8521.jpg
    1.2 MB · Views: 142
Hi Marty
I admire your project, I have a Sportsman as well although I didn't build it. I will vouch that you don't want anything sticking out. You will want all the room you can get inside. A couple years ago there was a Sportsman featured in EAA sport aviation that had one piece plexiglass doors that were blown out like bubble windows. Looked like the cats pajamas to me.
Joe
 
Hi Joe,
I remember that plane with the bubble doors. I heard something about the owner ground looping or landing hard and one of the safety cables broke, destroying the bubble door. Not sure if the bubble doors were fixed, something about not keeping the forms for the doors. I thought about doing something like that but decided that I need to move forward rather than making more time consuming changes; I also like the look of the solid doors. Another factor is that I wanted the windows to slide open for warm, slow flying. That part will be pretty easy to build as there are lots of examples. Your right about it being tight inside so every inch helps. It seems that every 2+2 has something different on the doors. I think what I have come up with using the one slider should work. Thanks for the kind words about my project.

Marty
 
So it seams that there is no one way to do these door latches. Seems like every 2+2 has a different way of closing the doors. Most seem to have just one latch, down toward the bottom, middle of the door. I came up with a latch design that I think will work well. Rather than a plunger, I build a lever at the bottom of the door that is connected to a truck camper shell T handle up top. Everything will be under the door panel so nothing to catch on clothing or fingers. To open the door on the inside, the latch has to be lifted up so it will be more difficult to accidentally bump the door handle and open the door. I still have skin, hinges, and gas springs to do but the major headache (IMO) is over. It there is anything I'm missing in my design or other concerns, let me know.

Marty

IMG_8562.jpg IMG_8563.jpg
 

Attachments

  • IMG_8562.jpg
    IMG_8562.jpg
    1.3 MB · Views: 131
  • IMG_8563.jpg
    IMG_8563.jpg
    1.2 MB · Views: 138
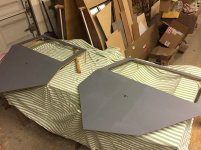
With the latches done, it was on to the door skins today. I'm using 1/8" ply and will cover with fabric. The window will be sliders, same as on a Super Cub. I have a pretty good idea on the sliders, lots of good info here on SC for that step. It's good to be moving along.

Marty

IMG_8632.jpg
 

Attachments

  • IMG_8632.jpg
    IMG_8632.jpg
    807.6 KB · Views: 92
I started working on the sliding windows today. There are lots of good posts on the subject and lots of details of failures. I'm using .100 acrylic and will be using stiffeners on the vertical edges. Question is what material to use? I made a couple out of .025 aluminum x 5/8" channel, pretty easy to make. They seem stiff, but are they stiff enough? Any idea what the dimensions and material thickness the parts are from Cub Crafters that many of you have used? First channel picture below. Thanks.

Marty

IMG_8643.JPGIMG_8642.JPG
 

Attachments

  • IMG_8643.JPG
    IMG_8643.JPG
    1.7 MB · Views: 89
  • IMG_8642.JPG
    IMG_8642.JPG
    1.6 MB · Views: 124
Last edited:
I used the Cub Crafters ones and like them. I just ran over to the hangar a few min ago to measure, they are .0335 at the flange which sticks out as a finger-hold. They are coated black; dunno whether anodized, painted or powder coated. Anyway, I'd guess the metal at .032 nominal. I wouldn't want them any thinner than what I have, as they flex "a little" when operated, but work very well.
 
Gordon,
Thanks for checking. Hmmmmmm; I couldn't find anything thicker than the .025 locally, next size was .050. If you are measuring .035 at the flange; I suppose there's a few thousands in paint. May be .032" material. I'll have to decide if I want to make them with thicker material or not. I saw one of your posts about windows, you used .80, mine is .100 so the added strength may be ok. For the track, I'm using UMHW plastic and each window will have it's own slot so they will have less flex in the horizontal plane. Each slot will be about .105 and about 3/16" deep so the window will be a close fit. Thoughts? New territory here for me. Below is a shot of the second stiffener with the finger hold. Thanks again for going out and checking for me.

Marty

IMG_8645.JPGIMG_8644.JPG
 

Attachments

  • IMG_8645.JPG
    IMG_8645.JPG
    1.6 MB · Views: 79
  • IMG_8644.JPG
    IMG_8644.JPG
    1.7 MB · Views: 117
My first photo post, here's my solution for door latches. A 4 inch electronics rack handle moves pultruded carbon rods from an online kite shop. The aluminum ferrules let you taper the ends without fear of fraying and you get a good tight closing.
 

Attachments

  • P1000350.jpg
    P1000350.jpg
    988.8 KB · Views: 111
My first photo post, here's my solution for door latches. A 4 inch electronics rack handle moves pultruded carbon rods from an online kite shop. The aluminum ferrules let you taper the ends without fear of fraying and you get a good tight closing.

Is that a flat fender behind you cub cadet?

Glenn
 
Yeah, I put a governor and pto on it so it turns the pto generator sitting there. The yellow tank is just junk. Jeep ptos are around, but I had to weld up a mount for a new Pierce governor. As soon as I finished the power company rebuilt 10 miles of line all the way from the substation and haven't lost power since.
 
For the track, I'm using UMHW plastic and each window will have it's own slot so they will have less flex in the horizontal plane. Each slot will be about .105 and about 3/16" deep so the window will be a close fit. Thoughts?
I used wood for the tracks, like original Piper. I think my slots are simply a saw-kerf wide, so call it .125? I'd suggest considering a track that gives more than .005 clearance, to allow for dirt or ?? that might get in there and bind.
 
I'm using UMHW plastic and each window will have it's own slot so they will have less flex in the horizontal plane.

I used wood for the tracks, like original Piper. I think my slots are simply a saw-kerf wide, so call it .125? I'd suggest considering a track that gives more than .005 clearance, to allow for dirt or ?? that might get in there and bind.
Just a thought, the wood slide may provide more friction thus reducing a tendency to slide open or closed on it's own. Some planes used the felt grooves similar to old car window slides. Also I believe that the originals used rivets to fasten the stiffeners to the plexi. Be careful when using this method as it is easy to over stress the plexi causing cracks to emanate from the holes if the holes are drilled too tight/small.
 
I used wood for the tracks, like original Piper. I think my slots are simply a saw-kerf wide, so call it .125? I'd suggest considering a track that gives more than .005 clearance, to allow for dirt or ?? that might get in there and bind.
Gordon,
I'm using a saw kerf also. Blade measures .105 but I'm sure it wobbles some, that will be my track opening. The wood is another idea; may try that first. I'm going to have a Velcro dot somewhere on the stiffener flange that will hold the window closed so it won't vibrate open if necessary, that should be easy. Tracks should be pretty easy. I'm currently waiting on some bigger piano hinges (2" vs the 1-1/2" that I have) Smaller hinges put holes too close to edges of both the wood and the hinge. Should get that today. There's a lot more to these doors than I imagined; maybe that's why there is nothing in the plans. Thanks for the advice guys.
Marty
 
Back to making progress after a couple months of travel and other commitments; time to get moving. I finished up the doors and started the covering process. I covered the first door in fabric yesterday using the Stewart's System. I sure like using their system. I covered the door on our big butcher block table in the kitchen ....... with my wife home and taking pictures for me. Little or no smell. My wife didn't notice any glue smell until I did the final full wipe down of glue at the end. It's a great product. Here's a shot of the first door.

IMG_9130.jpg

Everything went very well, the sliding window will be fitted after I prime the surfaces. I have a question for you fabric wizard's out there concerning the round corners inside the window opening. I darted the fabric from the outside in than cut a patch for the inside corner and darted it and glued to the outside. The darts were located off-set each other so their is continuous fabric around the corner. Here's a shot of the finished corner:

IMG_9131.jpg

My question is am I finished with this corner or do I need to put a patch over the darts on the surface? The inside darts are covered by the patch that formed the darts shown above. Here's a couple of ideas for corner patches, if needed.

IMG_9133.jpg

Any other issues with the fabric on the doors that I'm missing? Should I put a pinked patch over the area where the door latch will attach? Door latch is a basic black camper shell "T" handle located in the middle of the door about 4"below the window.

Thanks,
Marty
 

Attachments

  • IMG_9130.jpg
    IMG_9130.jpg
    600.3 KB · Views: 214
  • IMG_9131.jpg
    IMG_9131.jpg
    721.4 KB · Views: 165
  • IMG_9133.jpg
    IMG_9133.jpg
    646.2 KB · Views: 165
I have a question for you fabric wizard's out there concerning the round corners inside the window opening. I darted the fabric from the outside in than cut a patch for the inside corner and darted it and glued to the outside. The darts were located off-set each other so their is continuous fabric around the corner. Here's a shot of the finished corner:

View attachment 31559

My question is am I finished with this corner or do I need to put a patch over the darts on the surface? The inside darts are covered by the patch that formed the darts shown above.
Done. :up
 
Second door covered, ready for first cross coat of EkoFill.

IMG_9136.jpg

First cross coat done.

IMG_9144.jpg

So far, everything about Stewart's system is pretty easy.

Marty
 

Attachments

  • IMG_9136.jpg
    IMG_9136.jpg
    728.2 KB · Views: 140
  • IMG_9144.jpg
    IMG_9144.jpg
    737.1 KB · Views: 135
Last edited:
Today I finished up the sliding window tracks. I made the tracks out of HDPE (High Density Polyethylene) from McMaster. Before covering the doors, I made the stiffeners for the windows. Tomorrow I'll cut some plastic for the windows and install everything and see how it all fits. The slots in the tracks were made on my table saw and are a nice close fit for the glass. Almost done with these doors.

Marty

IMG_9145.jpgWhat is High Density Polyethylene (HDPE)
 

Attachments

  • IMG_9145.jpg
    IMG_9145.jpg
    677.6 KB · Views: 146
Beautiful work Marty, you may want to consider introducing some friction so that vibration does not move the windows in flight.
 
Beautiful work Marty, you may want to consider introducing some friction so that vibration does not move the windows in flight.
I think the windows will stay put but time will tell. I will have a strip of felt on the front reinforcement strip of the rear window that will rub against the front (outer) window. When closed, the front and rear edge reinforcements will be up against a rubber of felt seal on the vertical posts of the door frame. That should provide a positive amount of friction to keep things closed. As for movement when open in flight, we will see. The track slots are a tight fit; window plexi is .100 and the slot is not much bigger. The tracks are held in with the three screws at the top (hinge screws) and three screws w/nuts at the bottom so it's easy to remove if I need to make any changes. Definitely something I have been thinking about using the HDPE .

Marty
 
I cut the windows and installed the tracks for the sliding window. The stiffeners are just pressed in place and are not yet permanent. Friction on the slide is nice, easy to move. I will install felt on the aluminum that will add friction between the windows and a seal of some type at the front and rear verticals of the window opening. The windows will be lockable from the inside with a simple strip of plexi set into the outer track between the front handle and the front edge of the rear window. I'm pretty happy with the set up. There was a lot of guess work but everything fell into place. I am testing a caulking on some scrap to glue the plexi and the stiffeners. I reciently had the roof of my motorhome come loose because the caulking had deteriorated (12 year old motorhome) Winnebago specifies a specific caulking adhesive to glue the aluminum roof to the fiberglass sides. I'm trying that caulk to see how it works. Any other suggestions or known methods to attach the strips sure would be nice hear about. I know others have riveted the strips on but I don't want to crack the windows. I'll see tomorrow how the adhesive works. Video's attached of the front and rear window.

 
Nice Marty! I found that 3/32 soft rivets, with the plexi holes plenty large is easy and durable. Maybe experiment a little bit with some scrap?? I just tapped the rivets with a light weight hammer, backed on a hard surface, to fatten them - didn't use a gun.
 
Thanks Gordon; I'll try the soft rivets. I glued a couple test pieces of aluminum with the caulk; it seems to be bonding real well after just a few hours. Tomorrow will be a good test. This caulk is a specific Winnebago part number and is literally all that holds the roof in place. It's pretty impressive stuff. I have plenty of scrap to try the rivets also. I'm sure glad to be about done with these doors!
Marty
 
Back
Top