Bearhawk Builder
FRIEND
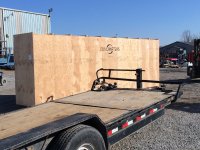
In the woods
GT40, Fastback Mustang, Carbon Cub - will you adopt me? I don't eat much and can split wood like a machine.
I don't even have a place in my garage to put my Honda Civic.... I would not put a GT40 out for 2 saw horses!
I'm just really jealous... You'll be an happy man when the kit arrives! Keep us inform.
Was wondering, does cubcrafters work with you or is it a one all kit for everyone?
http://www.cubcraftersforums.com/attachment.php?attachmentid=713&d=1289232661 I just like this idea. Among a lot of other ones.
Why am I the only one with a supercub.org hat on in that pic?
Jake
Why am I the only one with a supercub.org hat on in that pic?
Jake
How goes the build? I'm hoping to continue covering next month.
jake


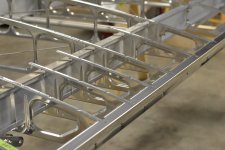
Wings Since Carbon Cubs don’t leave a lot of room for creative engineering and since their construction is well documented in other places, I won’t dwell on the details.
I look at them as a expensive carbon copy of the super cub!!!OK, you have me confused, why are you calling this a Carbon Cub? That looks a lot like aluminum to me.
I look at them as a expensive carbon copy of the super cub!!!
Carbon or no carbon, it still looks great, simple, light. Ceslaw before the tank with the tank straps, before the aileron, with all the pulleys and brackets, and before the flaps, with there hardware, weigh that for us?