• If You Are Having Trouble Logging In with Your Old Username and Password, Please use this Forgot Your Password link to get re-established.
  • Hey! Be sure to login or register!

Building a Javron Cub

Folks

In the process of the annual/rebuild I completely disassembled the airplane. The tail was removed, wings taken off, all interior removed, all controls, floorboards, etc removed. I went about as far as I could go without ripping the fabric off. I have been really surprised at how clean it is and how good of shape it is in. I have not found any dead fish or minnows. LOL
Very little corrosion or rust. Probably no more than would be normal. The Cub has 325 hours on it and they have been pretty hard hours. It has been rained on a LOT, hailed on, snowed on, been on floats, in Idaho, and generally run hard. Often full of camping gear and often with a passenger. I am pleased. But I wanted to inspect, lubricate, adjust and in general go over it very carefully before heading North again.

A list of some of the things done would be.......

Removed and cleaned under floorboards
Cleaned floorboards - no problems with delamination or water absorption
Removed torque tube - cleaned and lubricated and reinstalled
Lubricated all elevator, and rudder cables
Removed, cleaned, inspected, and reinstalled brake master cyls
Removed rudder pedals, and brake arms, inspected, cleaned and lubed all saddles - reinstalled - adjusted return springs for freedom of movement
Removed all pulleys, inspected, lubed and reinstalled - dang there are a lot of cotter pins in there
Fixed a tight left rudder pedal cable attach bracket
Cleaned tail surfaces, cleaned and lubed all clevis pins - ......more cotter pins
Replaced 3 tail VG's knocked off in helicopter lift out
Installed a new and improved ELT ground plane - tested ELT
Updated 406 contact info page with NOAA
Removed horizontal stab through tubes, cleaned, inspected, lubed, reinstalled with new hardware
Cleaned, lubed, inspected tail brace wires
Removed the Princeton Fuel Probe system - this did not work well. The tanks are too shallow for the probes to give accurate info - saved 12 oz
Adjusted the electric trim down stop. added another 1/4 travel or so
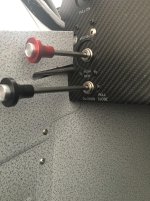
Replaced the Ztron labs master relay. Unfortunately it was leaking a small amount of current draining the battery. Also, unfortunately, it is no longer being produced. Too bad, it was excellent. Not enough sales volume. Std master relay added one pound and one amp. SUCKS
Adjusted throttle tension to prevent creeping
Removed manifold pressure gage and sending unit. Just not used with a fixed pitch prop. Saved 4.25 oz
Removed 8 amp alternator and install 20 amp unit. Redid a LOT of the wiring
Installed fuel pod, and installed pump, plumbing, fittings, wiring, toggle switch, fuse etc. Tested for function
Installed new door and window seals since I fly in the rain a lot. Gotta be tight
Installed wig-wag landing lights in wing leading edges
Installed and painted new headliner
Built a whole new cowling, painted, etc
Fabricated and installed a plenum for the engine

ETC ETC ETC


IMG_05432.jpg

New headliner going in. Tried it again, still don't like Stewarts glue

IMG_0550.jpg

New headliner in and painted


IMG_0560.jpg

Made this "T" shaped brace to attach the plenum to. That way it is in two pieces and can be installed and removed without taking the cowl brace rails out. Used the baffling that was already there. The plenum should help with cooling but just as important (at least to me) it will reduce the stress and "working" of the cowling making it last longer and look better. I have not weighed it yet. I will report when I am finished as to its function and weight. The center bracket was made from .025 riveted together. The tops are .020

IMG_0564.jpg

Right side of plenum


IMG_05591.jpg

If you don't have one of these rivet drill jig tools, GET ONE, its the best thing ever!!

IMG_05551.jpg

This is the little cowl brace that attaches to the cowl brace channel and holds the channel up and in position. Hint....run a tap (say 10-32) in the hole and it will make removal and reinstall of the rails a LOT faster and easier when you are building and taking them on and off every 15 minutes. When you assemble for the last time use a longer screw and add a nut just to make sure. When the tube is flattened there is more than enough thickness there to run a tap in. Really Really helps make life easier.

More to come.....Hope it helps

Bill
 
Last edited:
IMG_0539.jpg

Installed an Airglass LT32 fuel pod. Pod and mount hardware weighed 27.6. Fuel pump, lines, wires, fuses and switch added another 2.5 for a total of about 30 pounds. Last year I carried an extra 20 gallons (Four 5 Gallon jugs in the float lockers) and that helped on a couple of occasions. It gives you more options which increases safety. But the jugs themselves weighed 2.5 pounds each, so the net gain is closer to 20 pounds.....and it is a LOT easier to refuel. No more balancing on the strut and trying to lift 30 pounds over your shoulder, then starting a syphon. Now just flip a switch and it can be done in flight. Easy to remove when not needed.
Perhaps the best part is it has less affect on the CG. The Whip float lockers are forward and any weight added in the lockers (i.e. 20 gallons of fuel), exacerbates an already forward CG tendency. With the pod the fuel is very close to the CG and thus less of a W&B issue.


IMG_0549.jpg

New cowling being built


IMG_0558.jpg

Taping off for the stripes. New decals ordered.


I'll keep adding stuff as I go, if I think it might help someone else. Lord willing I'll get it all done and see you guys at the Trade Show in a couple of weeks.

Hope this helps (or maybe just entertains)

Bill
 
How can you NOT like Stewarts glue??????!!!!!!!!!! I've been using it since the mid 90's and can't remember a time I didn't like it!!
John
 
Folks

A little video so I can try to remember how to do all this.......man , it is amazing how quickly I can forget.......


John - I know Stewarts glue is good, it's just me. It has no wet adhesion and that drives me nuts. If I ever get smart enough to figure out how to use it..........

Eddy - Don't really know.....just depends on when I can get it all done and ready. Want your very own F-16?......just buy some land off the end of the runway. They're like Lawn Darts. LOL

Bill
(lets see if this works)
 
Looks good, and I like your wig-wag solution - much brighter and *lighter than mine!

EDIT: for a typo!
 
Last edited:
Wow, that's a lot of work accomplished Bill! I got tired just reading your report!! :) Looks great though. Excellent, as usual.
 
Great updates Bill! Guess something has happened with my subscription to your thread, haven't seen notification of the last few updates. Been too wrapped up in my own stuff. Congrats and hoping you'll keep the updates coming, to include AK PT II. Lots of fun living vicariously through your exploits. Thanks for all you do for us mortals!
 

Hmmmmm????? As usual you are doing wonderful work Bill and it is appreciated of all of the detail which you present in your posts. My question to myself is "why is this weight conscious guy adding the weight of this unnecessary collection of parts to his plane?", "Why two tops for his plenum?", "Why does he add unnecessary maintenance access to his engine?" and "What prompted this idea?, Did he have a defective cooling system?". The top cowl with the proper flexible baffling on the fixed baffles does a wonderful job of directing the cooling air without this extra plenum.
 
skywagon8a

All excellent questions. Why add the weight? Well part of the reason is to experiment. I want to see if this will make a difference. If I don't feel like it helps much I can assure you it will come off (just like the Princeton Fuel Probes and the MP gauge stuff)

I guess the best answer I can give is .....I'm experimenting. I want to see if it makes a difference and if its worth it.

Bill


Keep Experimenting and posting results Bill
I'm sure that this thread will save me many many hours when I start my Javron build next month
 
Avnxtek - Thank you for the kind words. The whole reason for doing this thread was to try to help others. If you find some help here then I have achieved my goal.

Folks - an update

MUFFLERs - I have a Sutton muffler now. It has worked well but it hangs below the nose bowl mounting rails and so requires bump outs in the lower cowl. This is NOT the fault of the muffler it is due to me dropping the engine 2" to compensate for the Thrustline mod and to try to get the cowl lines back to normal. I thought I would try a Vetterman Exhaust hoping to avoid this when I built the new cowl. Clint Busenitz at Vetterman was OUTSTANDING. He really bent over backward to rush build, and send me an exhaust. Absolutely first rate customer service!!! His muffler is very well made and fits beautifully. I was most impressed. Unfortunately, lowering my engine mount affected his exhaust as well. It was going to require a couple of bump outs of the bottom cowl to make it work. Not the fault of his muffler, it fits normal Cubs just fine, just not a 2" lowered mount (without some "adjusting").
Bottom line - since I was going to have to make the bump outs either way I just stayed with the muffler I had, but I gotta say, I was REALLY IMPRESSED by the Vetterman exhaust and I would highly recommed it. And Clint's service was above and beyond. Thank you Clint!

IMG_0574.jpg

New cowl coming together. Since I don't have a paint booth right now, I did all the prep work and my neighbor and friend, Jim did the painting.

IMG_0567.jpg

Final version of the Wig Wag lights


IMG_05661.jpg

Final weights for the lights (including paint) = 1.1 oz for all hardware nut plates, screws rivets etc,
3 oz for the trim piece,
9.2 oz for the plexiglass lens cover,
3.8 for the mount,
11.6 for the light,
4.4 for wires,
Total for each light 33.1
Less 7 oz for material removed = 26.1 oz per light, so that added a little over 3 pounds total. I think the increased visibility and safety benefit will be worth it.


Alternator added about 40 oz

Pod added 30 pounds

Plenum center rail = 3.45 oz
Plenum left side = 11.9
Plenum right side = 12.4
Less 10 oz material removed
Total added plenum weight = 17.75 oz or just over 1 pound. This, if it works, will be well worth it.

Now lets put some fuel on the fire and get some folks all riled up. The next "experiment" is a valve between the engine and the oil cooler. I can not take credit for any of this. It was offered by someone far more intelligent than I, and with a lot more aviation experience. This system allows you (the pilot) to directly, manually, control the oil temperature. You have a push/pull knob that allows you to control Carb air and also mixture. I now also have one that controls a valve that meters oil into the cooler.
First you must remove the Vernatherm so all oil ALWAYS flows through the cooler. Then you insert a spring Lyc part # 69436, and a plunger Lyc # 62415
into the engine........


IMG_0575.jpg

Goes in under the large bolt under the oil breather hose port.......


get-attachment_aspx5.jpg

It is part # 1 and 2 in the diagram above.

This allows oil to circulate through the engine based on oil pressure if the oil cooler is blocked off (or controlled off or metered down via a valve) so at no point should the engine be without oil, of adequate pressure, and volume.

IMG_05781.jpg

This is the valve, Parker part # XV501SS-6 MSC (a retailer) #04479804
It is a stainless steel, 3/8 ball valve, MNPT/FNPT. The cable comes through the firewall via a locking eyeball mechanism and goes straight to the valve handle. Although the valve is a 90 degree unit it is pretty much fully closed at 45 degrees of travel.


IMG_05792.jpg

Therefore this is pretty much fully closed. You normally start an engine with all controls (mixture, carb heat, Prop levers, etc) fully forward, or "in" if you want to say it that way. In this set up the oil valve knob will be fully forward "in" as well and in this position the valve is fully open so all oil is going through the cooler. After start, or take-off, or climb you can then adjust the valve and thus the oil temp as needed. With the glass cockpit I will also get a LARGE red warning if my oil temp were to exceed a preset value (whatever I decide I want the warning at) just in case I forget to pay attention. Why do it? Well I often find my oil temp is too low, especially in the winter and I believe this will solve that problem. Furthermore, those who have done this, (I'm not the first Cub guy and there are a number of guys in the RV community that have done this), say that it is common for the oil temp to go down when the valve is closed a little before further closure increases oil temp. The speculation is that by slowing down the flow, the oil spends a little more time in the cooler which allows more heat to be removed before the oil is circulated back into the engine.
I admit I have not tried this out yet but I am pleased with the installation and how it seems to be working. I tried the louvers in front of the oil cooler last Cub and that only managed to change the oil temp by about 10 degrees. In other words the louver technique did not work for me. I believe this mod will be very helpful in the winter, or when you depart at very cold temps but the day warms up a bunch or perhaps during significant altitude changes with large changes in outside air temps. It is an experiment (by me) that has been successfully done by others. I will report the results in a week or two after flying it 20 or 30 hours.
Added weight 12 oz.

IMG_05802.jpg

Back on floats. Still more to do but making significant progress.


Hope this helps

Bill
 
Bill
Just playing devil's advocate here. On start up, don't most oil systems route oil through the engine and not through the cooler? The vernatherm doesn't route the oil through the cooler until the temps come up. Also, the spring/slug bypasses the cooler as long as the pressure is high due to cold/thick oil.

Wouldn't you want to start up with the oil cooler blocked off?

Web

The vernatherm (depending on case design maybe, but on my Lycoming) actually passes a small percentage of oil through the oil cooler at all times. I've heard the amount is between 10-20%, but I have no idea if that's accurate. I think the purpose is to prevent oil congealing in the cooler during really cool OATs, and causing damage when the oil circulating in the engine comes up to temp enough to open the vernatherm. But again, that's a personal theory - I'm not sure if that's why its designed that way.


But, if I personally get to chose what's happening to the oil cooler at all times, I'd probably keep it "closed" until about 150 deg F, then start opening it very slowly and as necessary to peak and hold around 180-190 deg F. I put "" around closed because I'd run it like Bill is in the "closed" position and have a little bypass to keep any oil in the oil cooler from congealing so that I don't have to worry about a big booger of oil breaking things when it comes time to slowly start opening the valve.


Bill, I've debated putting a set up like this in mine for the opposite reasons you did. I've got a high oil temp O-320 that I'd like to wring more cooling out of. I've got a few tricks left to try in case my last round of airflow mods didn't lower the oil temps enough for AL summers. I really appreciate you putting part numbers and pictures up here, that'll help a ton if I go this route. Would you mind posting a picture of the cockpit side of your control? I know where I'd put mine if I installed one, but I like the layout of your dash and wanted to see how you incorporated another control.
 
CamTom12

P1030909.jpg

Not the best photo but it was quick to find. L-R = Carb Heat, Mixture, Cabin Heat, Oil Heat (for lack of a better term)

Bill
 
IMG_6874.jpgIMG_6875.jpgIMG_6527.jpg

This is how my friend plumbed in my oil control valve for an 0-340.
 

Attachments

  • IMG_6527.jpg
    IMG_6527.jpg
    965.2 KB · Views: 212
  • IMG_6875.jpg
    IMG_6875.jpg
    1.9 MB · Views: 208
  • IMG_6874.jpg
    IMG_6874.jpg
    1.1 MB · Views: 273
DJ
The only reason I can think of that cub pilots don't like the vernatherm is because they SUCK!!! Trying to solve a oil temp problem (hot or cold) with one can be a problem because they do bypass oil so in cold weather you still have to have some blocking of the cooler to keep the oil temps up. If you are too hot/cold is it the cooler or the vernatherm??? I have one and do not intend pull it out unless I have problems, I have block off plates for the oil cooler for 8 months of the year so I am fine.
Bill
I always learn something when I see your work!! great job.
DENNY
 
The vernatherm (depending on case design maybe, but on my Lycoming) actually passes a small percentage of oil through the oil cooler at all times. I've heard the amount is between 10-20%, but I have no idea if that's accurate. I think the purpose is to prevent oil congealing in the cooler during really cool OATs, and causing damage when the oil circulating in the engine comes up to temp enough to open the vernatherm. But again, that's a personal theory - I'm not sure if that's why its designed that way.


But, if I personally get to chose what's happening to the oil cooler at all times, I'd probably keep it "closed" until about 150 deg F, then start opening it very slowly and as necessary to peak and hold around 180-190 deg F. I put "" around closed because I'd run it like Bill is in the "closed" position and have a little bypass to keep any oil in the oil cooler from congealing so that I don't have to worry about a big booger of oil breaking things when it comes time to slowly start opening the valve.
Cam,
I have no idea if your percentage numbers are correct however the rest of your comments are. Provisions to have some oil flow through either an oil cooler or an oil tank/sump is very important to maintain continuous flow in cold temperature conditions. Our air cooled engines require a high viscosity oil for proper operation when compared to the oil in your car. (Why is a separate topic). Normal use is SAE 50 and in some radial engines SAE 60. Lower viscosity in cold temperatures. Because of this the oil turns thick (think molasses) when cold and does not flow well. The small amount of flow through the cooler/tank is to keep that oil warm enough to flow when it is needed by the engine.
The above is best illustrated by an accident which I knew of when it happened in the early 1960s. It was in the cold of winter in a four cylinder Continental kidney oil sump powered plane. The pilot had run the engine enough to warm the oil to go fly. While in the air he lost all oil pressure and crashed the plane. It was determined that the oil surrounding the pickup tube in the tank had warmed enough to allow the drain oil to travel along the pickup tube to the bottom then to be recirculated in the engine. This oil then gradually warmed the remaining oil in the tank. At some time the remaining cold/thick oil was reduced to a small glob which was sucked to the pickup tube where it blocked the flow to the oil pump causing loss of oil pressure.

The oil tanks in big airplanes like the DC-6, had a small reservoir in the tank which allowed a portion of the oil to be warmed enough to go fly and to prevent the above accident from happening. Thus your scenario of allowing a small flow through the cooler at all times makes sense. The large oil coolers on a Cessna 185 have a bypass for this same reason.
 
The large oil coolers on a Cessna 185 have a bypass for this same reason.

And, to add confusion, those were referred to as "non congealing oil coolers" when in fact, the coolers can and will congeal. But if they do, the bypass opens to return oil to the engine.

Good post, Pete.

MTV
 
Folks

Sitting in a hotel room trying to get everything done and I remembered another little tidbit.


IMG_1998.jpg

This is the throat of my Carb 0-360 engine so MA-4-5 Carb. Note the diameter is 2" 1/8


IMG_2003.jpg

This is my sump. Diameter is 2" 3/8

Well that is not going to be very good for the airflow. The carb and the sump are not the same size. Turns out Lycoming figured that out a long time ago and they issued SB258 to fix that problem. It is a cone shaped spacer that goes in the sump and creates a smooth air transition between the Carb and the sump. Over the years this has dropped off the radar and I think there are a bunch of engines out there that could benefit from this SB. Over on the Vans website a number of folks have tried it and report much improved CHT and EGT readings. Specifically it evens out the fuel distribution so all cylinders are much closer in CHT and EGT values. Some have even reported gaining static RPM.


SB258-2.jpg

This is a copy, best I could find, of the SB.

This part can be hard to find. Lycoming does not have it. I found it at.....

http://www.bolducaviation.com

I have now got this installed and it will be interesting to see the results. Unfortunately I have changed several variables at one time (plenum, oil heat, and SB258 ) so it might be tough to figure out which if any worked, but I will report the results, whatever they may be in a few days.

So.....next time you have things apart you might check your carb opening and sump opening and see if they match.

Hope this helps

Bill
 
Last edited:
Folks

Sitting in a hotel room trying to get everything done and I remembered another little tidbit.


IMG_1998.jpg

This is the throat of my Carb 0-360 engine so MA-4-5 Carb. Note the diameter is 2" 1/8


IMG_2003.jpg

This is my sump. Diameter is 2" 3/8

Well that is not going to be very good for the airflow. The carb and the sump are not the same size. Turns out Lycoming figured that out a long time ago and they issued SB258 to fix that problem. It is a cone shaped spacer that goes in the sump and creates a smooth air transition between the Carb and the sump. Over the years this has dropped off the radar and I think there are a bunch of engines out there that could benefit from this SB. Over on the Vans website a number of folks have tried it and report much improved CHT and EGT readings. Specifically it evens out the fuel distribution so all cylinders are much closer in CHT and EGT values. Some have even reported gaining static RPM.


SB258-2.jpg

This is a copy, best I could find, of the SB.

This part can be hard to find. Lycoming does not have it. I found it at.....

http://www.bolducaviation.com

I have now got this installed and it will be interesting to see the results. Unfortunately I have changed several variables at one time (plenum, oil heat, and SB258) so it might be tough to figure out which if any worked, but I will report the results, whatever they may be in a few days.

So.....next time you have things apart you might check your carb opening and sump opening and see if they match.

Hope this helps

Bill

http://legacy.cubcrafters.com/technical_publications/80/view
 
Excellent info Tom. Thanks for posting that link. That is a little different than the one I got from Buldoc. Mine does not have the flange on the bottom, it is more like just a cone, and slides up completely into the sump, so it does not affect the carb location/height, studs, gaskets, etc. But another option for sure.

Bill
 
Okay - can someone, who is not an idiot like me, tell me how to type the number eight and not get a stupid smiley face??? Please.

Thank you

Bill
 
Back
Top